
Stop Wasting $140/Year: Your Guide to Fixing a Leaking Toilet (EPA Says 40% Drip!)
Toilets account for nearly 30 percent of an average home’s indoor water consumption. Worse, the EPA estimates that 20% to 40% of toilets leak, often silently, wasting thousands of gallons of water annually.
Older, inefficient toilets (those using 6 gallons per flush) are major water wasters. However, by replacing old models with WaterSense labeled alternatives, the average family can reduce toilet water use by 20 to 60 percent—saving nearly 13,000 gallons of water and over $140 in water costs every year! Over the lifetime of the toilet, that’s nearly $2,900 in savings.
If your toilet is wasting water, the good news is you can often fix the problem yourself. A quiet leak is one of the most common issues you’ll encounter.
🛑 First: How to Check for a Silent Toilet Leak
A running toilet is obvious, but a quiet leak can be sneaky. Use this simple test before attempting any repairs:
Add Food Coloring: Drop 3-5 drops of dark food coloring (blue or red) into the toilet tank.
Wait: Wait a full 30 minutes without flushing.
Check the Bowl: If the coloring appears in the toilet bowl, you have a leak!
Flush Promptly: Flush the toilet immediately after the test to ensure the tank is not stained.
How To Fix a Leaking Toilet: A Step-by-Step Guide
Internal toilet leaks, if left unchecked, can waste water, hike up your utility bill, and potentially damage your floors or cause mold growth. Here is a guide to common causes and solutions.
Safety & Prep First
Turn Off the Water: Always turn off the water supply to the toilet before starting any repairs. You may need to shut off the main house valve if the toilet valve won’t close completely.
Tools You’ll Need: Wrench, screwdriver, bucket, sponge, and replacement parts (flapper, fill valve, wax ring, etc.).
Know Your Limits: If you’re uncomfortable with the repair, or if the leak seems complex, it’s always best to call a professional plumber.

1. The Constantly Running Toilet: Flapper Seal Problems
A faulty flapper is the most frequent cause of a toilet that runs constantly. The flapper is the rubber seal at the bottom of the tank that lifts when you flush and creates a watertight seal when the tank refills.
Signs of a Failing Flapper:
Physical Wear: Look for cracks, brittleness, mineral deposits, or general deterioration of the rubber.
Discoloration: If the flapper transfers color to your fingers when you touch it, it is breaking down and needs replacement.
Related Issues: Sometimes the flapper is fine, but the chain is too short (keeping it slightly open) or the flush handle is sticking. Check these first.
Solution: Replace the Flapper. Flappers are simple, inexpensive, and easy to replace. [Learn how to replace your leaky toilet flapper.]
2. The Running Toilet: High Float or Faulty Fill Valve
If the water level is too high, it constantly spills into the overflow pipe, causing the fill valve to run non-stop to compensate.
Step 1: Inspect and Adjust the Float
The float (ball or cup) dictates when the fill valve should stop adding water to the tank. The water level should be about one inch below the top of the overflow pipe.
Step 2: Replace the Fill Valve (If Adjusting Fails)
If adjusting the float doesn’t stop the running water, the fill valve itself is likely faulty. This is a common and relatively simple replacement.
Prep: Turn off the water supply and drain the tank by flushing. Use a sponge or shop vac to remove excess water.
Remove Old Valve: Disconnect the water supply line and unscrew the lock nut from outside the tank.
Install New Valve: Secure the new valve, reconnect the supply line, and adjust the new float to the desired water level (1 inch below the overflow).
Tip: While you are replacing the fill valve, it is often a good idea to replace the flapper at the same time for a total refresh.
3. Leak Between the Toilet Tank and Bowl
If you see water leaking down the back of your toilet or pooling under the tank, the issue is likely a worn-out tank-to-bowl gasket or loose mounting bolts.
Drain and Disconnect: Turn off the water, flush the toilet, and disconnect the supply line.
Remove the Tank: Locate and remove the nuts and bolts connecting the tank to the bowl (usually two or four). Use a wrench, and place a towel or bucket to catch drips.
Replace the Gasket: Carefully lift the tank off and remove the old gasket. Wipe all mating surfaces clean.
Reattach: Position the new gasket, align the tank, and lower it onto the bowl. Insert the bolts, and tighten the nuts in an alternating pattern (crisscross) to ensure an even seal. Be careful not to overtighten and crack the porcelain.
Test: Reconnect the water supply, turn it on, and check for leaks.
4. Leak At the Toilet Base: Replacing the Wax Ring
If you see puddles of water or black mold around the base of your toilet, your wax ring (the seal between the toilet and the floor flange) is leaking. This must be fixed immediately to prevent widespread water damage and mold growth.
Prep: Turn off the water, drain the toilet, and disconnect the supply line.
Remove Bolts: Remove the caps and unscrew the nuts holding the toilet to the floor.
Lift the Toilet: Carefully lift the toilet straight up and set it aside on a protected surface.
Clean and Inspect: Scrape off the old wax from the floor flange and the underside of the toilet. Inspect the floor flange for any cracks.
Install New Seal: Install a new wax ring onto the floor flange (centering the hole). Alternatively, use a modern, less messy wax-free toilet seal.
Re-seat: Carefully lower the toilet straight down onto the flange, aligning the holes with the bolts. Tighten the nuts firmly, but do not overtighten.
Test: Reconnect the water, turn it on, and flush to check for leaks around the base.
Take Signs of Mold Seriously
If you see black stains or signs of mold around a leaking toilet base, you have water damage. Stop leaks and dry the affected area within 24 to 48 hours to prevent further mold growth. Some people can be highly allergic to mold, and it can pose health risks.
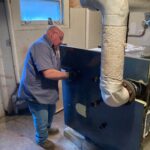
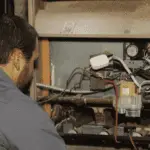
Expert Toilet Repair, Replacement, and Installation Services
Whether you need a simple wax ring replaced, a complex leak fixed, or are ready to upgrade to a new WaterSense model, PDM has been providing fast, reliable service since 1885.
Our master plumbers can help you with:
Toilet Repair and Troubleshooting
High-Efficiency Toilet Replacement
Taller or Shorter Toilets for Comfort
Bidet and Smart Toilet Installation
Safety Grab Bar Installation
Call PDM today for fast, expert toilet service: 815-390-7095.